This guide provides a step-by-step on how to install and configure Google Tag Manager (GTM) on Store Framework stores. The guide also highlights some restrictions to avoid performance issues and unpredictable behavior, including blocklists for custom HTML tags and variables.
If you have already installed the Google Tag Manager app, navigate to this guide's section titled Create a Google Analytics 4 property to create the property. Then, follow the instructions in Step 2: to enable the GA4 setting in the GTM app.
Before you start
Before proceeding with the installation, ensure you match the following requisites:
Access to a Google account
You need a Google account to use Google Tag Manager (GTM). If you already use Google products like Gmail, you can use the same account.
If you do not have an account for a Google product, create one by following Google's guide on Creating your Google account.
Access to a GTM Container
To use a GTM ID in your store, you'll need a GTM container. If you don't have one already, follow the steps in the create a new account and container tutorial.
Once you've created a container, you can find its GTM ID in the Container ID column. Be sure to take note of this ID, as you'll need it later during the installation process.
Create a Google Analytics 4 property
Create a Google Analytics 4 (GA4) property using the GA4 Setup Assistant. This property collects data in parallel with your existing Universal Analytics (UA) property. To create the GA4 property, follow Google’s official guide.
Take note of GTM settings
Take note of the Measurement ID, also known as G- ID, since it will be used later to set up the GA4 tag on GTM.
Step-by-step
Step 1: Installing the Google Tag Manager in Admin
-
In the VTEX Admin, access Apps > App Store.
-
Search for the Google Tag Manager app and click on
Install. You will be redirected to the App Store page. -
Login in to your App Store account if you still need to enter. After logging into your account, if the page redirects you to the App Store landing page, go to the search field, type Google Tag Manager and click on the app.
-
Click
GET APP. -
On the checkout page, click check out the Google Tag Manager terms and conditions. Read the terms and click on
PLACE ORDERif you agree. In this case, you’ll see a success message about the purchase.
The GTM is a free app.
- Click
GO TO INSTALL PAGE. This will redirect you to the GTM setup page, where you'll see a warning message about entering the necessary GTM configurations. - Type your GTM ID in the Google Tag Manager field.
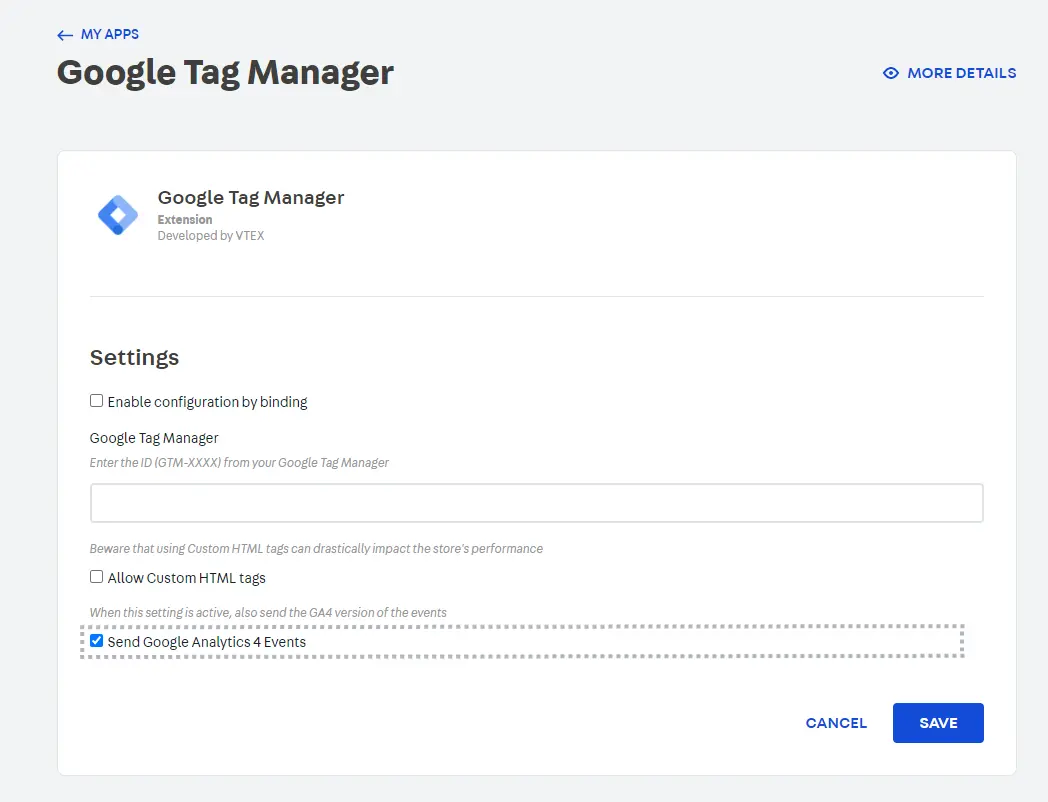
In the VTEX Admin, access Apps > My apps, check the box Send Google Analytics 4 Events, and click Save.
Once you have installed the app and check the box Send Google Analytics 4 Events, go to Configuring Google Analytics 4 Configuration tag in Google Tag Manager documentation and learn how to set up the variables, triggers, and tags necessary for the app to work.
To avoid performance issues and unpredictable behavior, the VTEX IO Google Tag Manager app uses the native GTM blocklist feature. This feature is thoroughly explained on the Google Developer Guide, but in short, it allows the app to block certain types of tags, variables, and triggers from firing. By default, the blocklist includes the HTML ID, which automatically blocks all the tags, variables, and triggers of the type customScripts. The main consequence of this blocklist is that Custom HTML tags are not triggered.
To avoid performance issues and unpredictable behavior, the VTEX IO Google Tag Manager app uses the native GTM blocklist feature. This feature is thoroughly explained on the Google Developer Guide, but in short, it allows the app to block certain types of tags, variables, and triggers from firing. By default, the blocklist includes the HTML ID, which automatically blocks all the tags, variables, and triggers of the type customScripts. The main consequence of this blocklist is that Custom HTML tags are not triggered.
The HTML blocklist is a VTEX Google Tag Manager app's default. If you want to disable this restriction, go to
https://{accountName}.myvtex.com/admin/apps/vtex.google-tag-manager@3.x/setupand check the box Allow Custom HTML tags.
The most widely used Custom HTML tags are integrations with third-party services, like Customer Chat, Analytics, Remarketing, and Pixel tags. If your store needs a Custom HTML for one of those cases, the integration can be done by transforming the tags into a VTEX IO Pixel App or by removing this restriction.
Check below the list of tags and variables that are blocked, by default, in the VTEX IO Google Tag Manager app:
Blocked tags
- Custom HTML Tag - html
- Eulerian Analytics Tag - ela
- SaleCycle JavaScript Tag - scjs
- Upsellit Global Footer Tag - uslt
- Upsellit Confirmation Tag - uspt
Blocked variables
- Custom JavaScript Variable - jsm
Check out a list with all the GTM available tags on the Google Developer Guide.